

openapi-to-mcp
The openapi-to-mcp plugin exposes an existing HTTP API to MCP (Model Context Protocol) clients. It generates tools from the API's OpenAPI document, serves the MCP endpoint from the gateway, and calls the corresponding API operations on behalf of clients. The plugin supports custom upstream headers and both Streamable HTTP and Server-Sent Events (SSE) transports.
The openapi-to-mcp plugin is available in both APISIX and API7 Enterprise. In APISIX, it generates tools and invokes APIs inside the gateway. In API7 Enterprise, the gateway plugin forwards MCP requests to a separate OpenAPI-to-MCP service. The two implementations share the basic route configuration but differ in deployment, caching, header forwarding, and supported options.
Examples
The first example uses native APISIX. The remaining examples use API7 Gateway and require the OpenAPI-to-MCP service.
Expose an API with APISIX
The following example exposes the public Petstore API through a stateless MCP endpoint. The gateway must be able to reach both the specification URL and the Petstore API.
Create a route without an upstream resource. The plugin calls the API at base_url directly:
curl "http://127.0.0.1:9180/apisix/admin/routes/petstore-mcp" -X PUT \
  -H "X-API-KEY: ${ADMIN_API_KEY}" \
  -H "Content-Type: application/json" \
  -d '{
    "uri": "/petstore-mcp",
    "plugins": {
      "openapi-to-mcp": {
        "transport": "streamable_http",
        "openapi_url": "https://petstore3.swagger.io/api/v3/openapi.json",
        "base_url": "https://petstore3.swagger.io/api/v3"
      }
    }
  }'
❶ transport selects stateless Streamable HTTP. The default transport is SSE, which requires session affinity across multiple gateway instances.
❷ openapi_url identifies the document used to generate MCP tools.
❸ base_url identifies the API that handles tool calls. The route does not need a separate upstream resource.
List the generated tools. The transport requires clients to accept both JSON and event-stream responses:
curl -N "http://127.0.0.1:9080/petstore-mcp" \
  -H "Content-Type: application/json" \
  -H "Accept: application/json, text/event-stream" \
  -d '{
    "jsonrpc": "2.0",
    "id": 1,
    "method": "tools/list"
  }'
The response contains a tools list including getPetById. Configure your MCP client with the same gateway URL to discover and call those tools. Protect production MCP routes with an authentication plugin such as key-auth, and expose only API operations that the client should be allowed to invoke.
See the configuration reference for document compatibility, caching, header forwarding, SSE session behavior, target restrictions, and all plugin fields.
Enable MCP Access to Petstore APIs
The following example demonstrates how to expose the Petstore APIs through the MCP protocol, allowing AI models and clients to interact with the Petstore service.
Create a route with the openapi-to-mcp plugin:
curl "http://127.0.0.1:9180/apisix/admin/routes" -X PUT \
  -H "X-API-KEY: ${ADMIN_API_KEY}" \
  -d '{
    "id": "openapi-to-mcp-route",
    "uri": "/mcp",
    "methods": ["GET", "POST"],
    "plugins": {
      "openapi-to-mcp": {
        "transport": "streamable_http",
        "base_url": "https://petstore3.swagger.io/api/v3",
        "headers": {
          "Authorization": "special-key"
        },
        "openapi_url": "https://petstore3.swagger.io/api/v3/openapi.json"
      }
    }
  }'
❶ Configure the route to allow GET and POST methods. The GET method enables the tool discovery and response streaming (SSE), while the POST method enables the execution and action capabilities (messages).
❷ Configure the transport method to be streamable_http (recommended for production).
❸ Configure the Petstore API address.
❹ Configure the Petstore API credential.
❺ Configure the Petstore OpenAPI document URL.
Create a route with the openapi-to-mcp plugin configured as follows:
services:
  - name: openapi-to-mcp-service
    upstream:
      type: roundrobin
      scheme: https
      pass_host: node
      nodes:
        - host: petstore3.swagger.io
          port: 443
          weight: 1
    routes:
      - name: openapi-to-mcp-route
        uris:
          - /mcp
        methods:
          - GET
          - POST
        plugins:
          openapi-to-mcp:
            transport: streamable_http
            base_url: "https://petstore3.swagger.io/api/v3"
            headers:
              Authorization: "special-key"
            openapi_url: "https://petstore3.swagger.io/api/v3/openapi.json"
Synchronize the configuration to the gateway:
adc sync -f adc.yaml❶ Configure the route to allow GET and POST methods. The GET method enables the tool discovery and response streaming (SSE), while the POST method enables the execution and action capabilities (messages).
❷ Configure the transport method to be streamable_http (recommended for production).
❸ Configure the Petstore API address.
❹ Configure the Petstore API credential.
❺ Configure the Petstore OpenAPI document URL.
Create a route with the openapi-to-mcp plugin configured as follows:
apiVersion: apisix.apache.org/v1alpha1
kind: PluginConfig
metadata:
  namespace: aic
  name: openapi-to-mcp-plugin-config
spec:
  plugins:
    - name: openapi-to-mcp
      config:
        transport: streamable_http
        base_url: "https://petstore3.swagger.io/api/v3"
        headers:
          Authorization: "special-key"
        openapi_url: "https://petstore3.swagger.io/api/v3/openapi.json"
---
apiVersion: gateway.networking.k8s.io/v1
kind: HTTPRoute
metadata:
  namespace: aic
  name: openapi-to-mcp-route
spec:
  parentRefs:
    - name: apisix
  rules:
    - matches:
        - path:
            type: Exact
            value: /mcp
          method: GET
        - path:
            type: Exact
            value: /mcp
          method: POST
      filters:
        - type: ExtensionRef
          extensionRef:
            group: apisix.apache.org
            kind: PluginConfig
            name: openapi-to-mcp-plugin-config
      backendRefs:
        - name: petstore-external-domain
          port: 443
---
apiVersion: v1
kind: Service
metadata:
  namespace: aic
  name: petstore-external-domain
spec:
  type: ExternalName
  externalName: petstore3.swagger.io
---
apiVersion: apisix.apache.org/v1alpha1
kind: BackendTrafficPolicy
metadata:
  namespace: aic
  name: petstore-external-domain
spec:
  targetRefs:
    - group: ""
      kind: Service
      name: petstore-external-domain
  passHost: node
  scheme: https
Apply the configuration to your cluster:
kubectl apply -f openapi-to-mcp-ic.yaml❶ Configure the transport method to be streamable_http (recommended for production).
❷ Configure the Petstore API address.
❸ Configure the Petstore API credential.
❹ Configure the Petstore OpenAPI document URL.
❺ Configure the route to allow GET and POST methods. The GET method enables the tool discovery and response streaming (SSE), while the POST method enables the execution and action capabilities (messages).
Create a route with the openapi-to-mcp plugin configured as follows:
apiVersion: apisix.apache.org/v2
kind: ApisixRoute
metadata:
  namespace: aic
  name: openapi-to-mcp-route
spec:
  ingressClassName: apisix
  http:
    - name: openapi-to-mcp-route
      match:
        paths:
          - /mcp
        methods:
          - GET
          - POST
      plugins:
        - name: openapi-to-mcp
          enable: true
          config:
            transport: streamable_http
            base_url: "https://petstore3.swagger.io/api/v3"
            headers:
              Authorization: "special-key"
            openapi_url: "https://petstore3.swagger.io/api/v3/openapi.json"
Apply the configuration to your cluster:
kubectl apply -f openapi-to-mcp-ic.yaml❶ Configure the route to allow GET and POST methods. The GET method enables the tool discovery and response streaming (SSE), while the POST method enables the execution and action capabilities (messages).
❷ Configure the transport method to be streamable_http (recommended for production).
❸ Configure the Petstore API address.
❹ Configure the Petstore API credential.
❺ Configure the Petstore OpenAPI document URL.
After applying the Admin API, ADC, or APISIX CRD configuration, update your MCP settings with the API7 Gateway address and append the previously created route path. For instance:
{
  "mcpServers": {
    "api7-petstore-mcp": {
      "url": "http://123.123.123.123:9080/mcp"
    }
  }
}
If the configuration is successful, you should see the available tools (external functions or services exposed to AI clients through MCP).
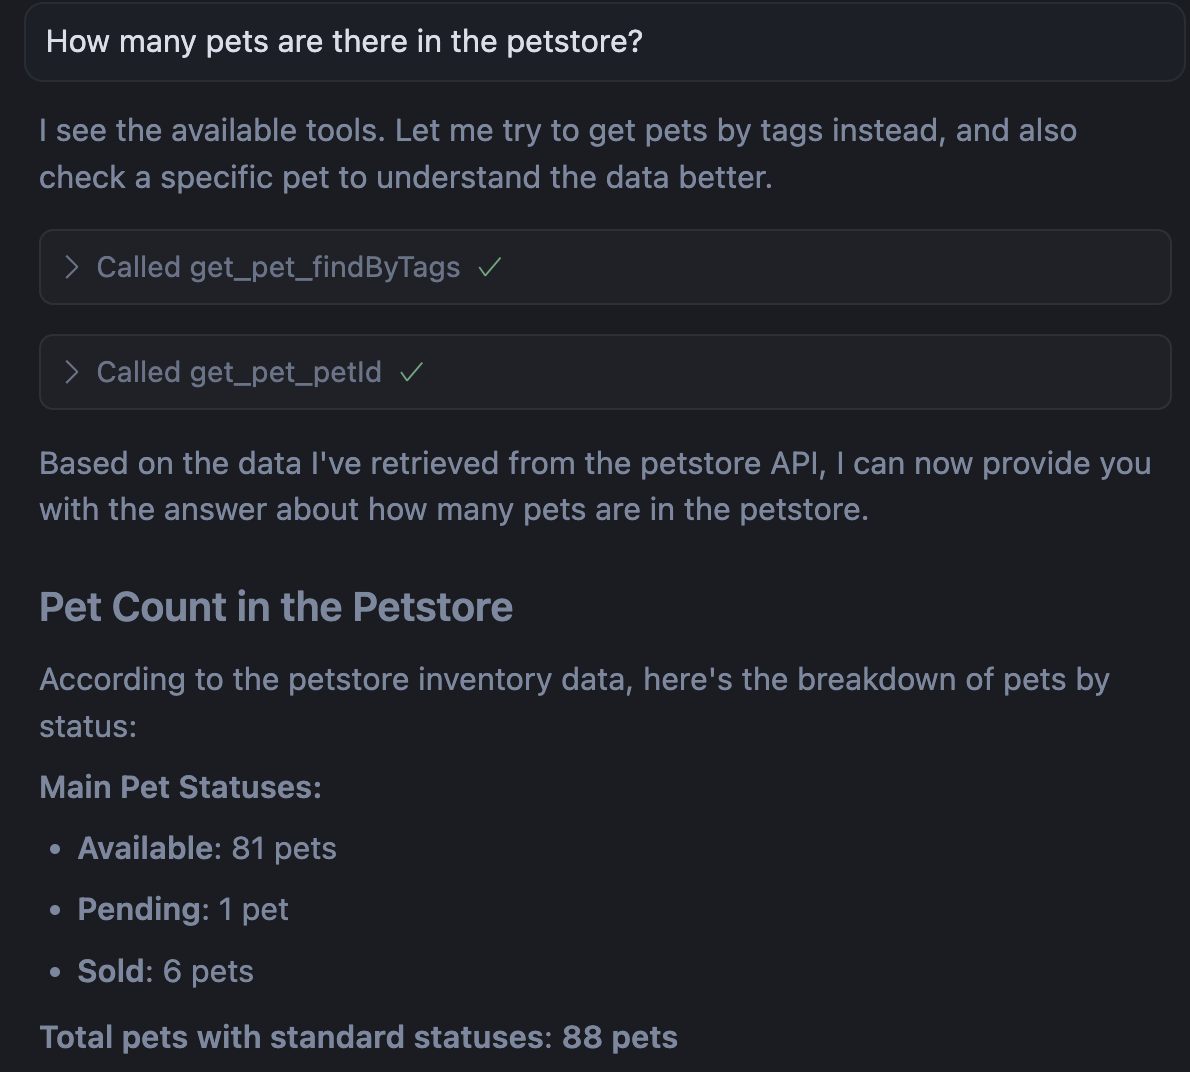
You can now interact with the Petstore service directly from the chat window of your AI client. For example, try asking: "Show me pet 1 from the petstore."
Configure Authentication for MCP Routes
The following example demonstrates how to expose Petstore APIs through the MCP protocol when the route is protected by an authentication method such as key-auth.
Create a consumer johndoe:
curl "http://127.0.0.1:9180/apisix/admin/consumers" -X PUT \
  -H "X-API-KEY: ${ADMIN_API_KEY}" \
  -d '{
    "username": "johndoe"
  }'
Configure the key-auth credential for johndoe:
curl "http://127.0.0.1:9180/apisix/admin/consumers/johndoe/credentials" -X PUT \
  -H "X-API-KEY: ${ADMIN_API_KEY}" \
  -d '{
    "id": "cred-john-key-auth",
    "plugins": {
      "key-auth": {
        "key": "john-key"
      }
    }
  }'
Create a route with the openapi-to-mcp and key-auth plugins:
curl "http://127.0.0.1:9180/apisix/admin/routes" -X PUT \
  -H "X-API-KEY: ${ADMIN_API_KEY}" \
  -d '{
    "id": "openapi-to-mcp-route",
    "uri": "/mcp",
    "methods": ["GET", "POST"],
    "plugins": {
      "openapi-to-mcp": {
        "transport": "streamable_http",
        "base_url": "https://petstore3.swagger.io/api/v3",
        "headers": {
          "Authorization": "special-key"
        },
        "openapi_url": "https://petstore3.swagger.io/api/v3/openapi.json"
      },
      "key-auth": {
        "header": "apikey"
      }
    }
  }'
Create a consumer and a route with the openapi-to-mcp and key-auth plugins configured as follows:
consumers:
  - username: johndoe
    credentials:
      - name: primary-key
        type: key-auth
        config:
          key: john-key
services:
  - name: openapi-to-mcp-service
    upstream:
      type: roundrobin
      scheme: https
      pass_host: node
      nodes:
        - host: petstore3.swagger.io
          port: 443
          weight: 1
    routes:
      - name: openapi-to-mcp-route
        uris:
          - /mcp
        methods:
          - GET
          - POST
        plugins:
          key-auth:
            header: apikey
          openapi-to-mcp:
            transport: streamable_http
            base_url: "https://petstore3.swagger.io/api/v3"
            headers:
              Authorization: "special-key"
            openapi_url: "https://petstore3.swagger.io/api/v3/openapi.json"
Synchronize the configuration to the gateway:
adc sync -f adc.yamlCreate a consumer and a route with the openapi-to-mcp and key-auth plugins configured as follows:
apiVersion: apisix.apache.org/v1alpha1
kind: Consumer
metadata:
  namespace: aic
  name: johndoe
spec:
  gatewayRef:
    name: apisix
  credentials:
    - type: key-auth
      name: primary-key
      config:
        key: john-key
---
apiVersion: apisix.apache.org/v1alpha1
kind: PluginConfig
metadata:
  namespace: aic
  name: openapi-to-mcp-plugin-config
spec:
  plugins:
    - name: key-auth
      config:
        header: apikey
    - name: openapi-to-mcp
      config:
        transport: streamable_http
        base_url: "https://petstore3.swagger.io/api/v3"
        headers:
          Authorization: "special-key"
        openapi_url: "https://petstore3.swagger.io/api/v3/openapi.json"
---
apiVersion: gateway.networking.k8s.io/v1
kind: HTTPRoute
metadata:
  namespace: aic
  name: openapi-to-mcp-route
spec:
  parentRefs:
    - name: apisix
  rules:
    - matches:
        - path:
            type: Exact
            value: /mcp
          method: GET
        - path:
            type: Exact
            value: /mcp
          method: POST
      filters:
        - type: ExtensionRef
          extensionRef:
            group: apisix.apache.org
            kind: PluginConfig
            name: openapi-to-mcp-plugin-config
      backendRefs:
        - name: petstore-external-domain
          port: 443
---
apiVersion: v1
kind: Service
metadata:
  namespace: aic
  name: petstore-external-domain
spec:
  type: ExternalName
  externalName: petstore3.swagger.io
---
apiVersion: apisix.apache.org/v1alpha1
kind: BackendTrafficPolicy
metadata:
  namespace: aic
  name: petstore-external-domain
spec:
  targetRefs:
    - group: ""
      kind: Service
      name: petstore-external-domain
  passHost: node
  scheme: https
Create an ApisixConsumer and a route with the openapi-to-mcp and key-auth plugins configured as follows:
apiVersion: apisix.apache.org/v2
kind: ApisixConsumer
metadata:
  namespace: aic
  name: johndoe
spec:
  ingressClassName: apisix
  authParameter:
    keyAuth:
      value:
        key: john-key
---
apiVersion: apisix.apache.org/v2
kind: ApisixUpstream
metadata:
  namespace: aic
  name: petstore-external-domain
spec:
  ingressClassName: apisix
  scheme: https
  passHost: node
  externalNodes:
    - type: Domain
      name: petstore3.swagger.io
      port: 443
---
apiVersion: apisix.apache.org/v2
kind: ApisixRoute
metadata:
  namespace: aic
  name: openapi-to-mcp-route
spec:
  ingressClassName: apisix
  http:
    - name: openapi-to-mcp-route
      match:
        paths:
          - /mcp
        methods:
          - GET
          - POST
      upstreams:
        - name: petstore-external-domain
      plugins:
        - name: key-auth
          enable: true
          config:
            header: apikey
        - name: openapi-to-mcp
          enable: true
          config:
            transport: streamable_http
            base_url: "https://petstore3.swagger.io/api/v3"
            headers:
              Authorization: "special-key"
            openapi_url: "https://petstore3.swagger.io/api/v3/openapi.json"
Apply the configuration to your cluster:
kubectl apply -f openapi-to-mcp-ic.yamlWhen an MCP server requires authentication, you can specify headers in the mcp.json configuration. Refer to the documentation of your AI client to verify whether headers are supported.
If Headers Are Supported
After applying the Admin API, ADC, or APISIX CRD configuration, update Cursor with the API7 Gateway address and the route path created above. Include the header required by key-auth:
{
  "mcpServers": {
    "api7-petstore-mcp": {
      "url": "http://123.123.123.123:9080/mcp",
      "headers": {
        "apikey": "john-key"
      }
    }
  }
}
The configured headers will be added to both GET and POST requests.
If the configuration is successful, you should see the available tools (external functions or services exposed to AI clients through MCP). You can then interact with Petstore directly from the chat window of your AI client.
If the authentication header is not configured in mcp.json, the AI client will be unable to load tools from the MCP server.
If Headers Are Not Supported
If your AI client does not support configuring headers in mcp.json, you can include the authentication credential in the MCP URL query, since key-auth supports obtaining credential from the URL query.
Update the key-auth configuration on the route as such:
curl "http://127.0.0.1:9180/apisix/admin/routes/openapi-to-mcp-route" -X PATCH \
  -H "X-API-KEY: ${ADMIN_API_KEY}" \
  -d '{
    "plugins": {
      "key-auth": {
        "_meta": {
          "filter": [
            [
              "request_method",
              "==",
              "GET"
            ]
          ]
        },
        "query": "apikey"
      }
    }
}'# other config
# ...
services:
- name: openapi-to-mcp-service
upstream:
type: roundrobin
scheme: https
pass_host: node
nodes:
- host: petstore3.swagger.io
port: 443
weight: 1
routes:
- name: openapi-to-mcp-route
uris:
- /mcp
methods:
- GET
- POST
plugins:
key-auth:
_meta:
filter:
- - request_method
- "=="
- GET
query: apikey
openapi-to-mcp:
transport: streamable_http
base_url: "https://petstore3.swagger.io/api/v3"
headers:
Authorization: "special-key"
openapi_url: "https://petstore3.swagger.io/api/v3/openapi.json"Synchronize the configuration to the gateway:
adc sync -f adc.yamlUpdate the PluginConfig:
# other configs
# ---
apiVersion: apisix.apache.org/v1alpha1
kind: PluginConfig
metadata:
  namespace: aic
  name: openapi-to-mcp-plugin-config
spec:
  plugins:
    - name: key-auth
      config:
        _meta:
          filter:
            - - request_method
              - "=="
              - GET
        query: apikey
    - name: openapi-to-mcp
      config:
        transport: streamable_http
        base_url: "https://petstore3.swagger.io/api/v3"
        headers:
          Authorization: "special-key"
        openapi_url: "https://petstore3.swagger.io/api/v3/openapi.json"
Apply the updated configuration to your cluster:
kubectl apply -f openapi-to-mcp-ic.yamlUpdate the ApisixRoute:
# other configs
# ---
apiVersion: apisix.apache.org/v2
kind: ApisixRoute
metadata:
  namespace: aic
  name: openapi-to-mcp-route
spec:
  ingressClassName: apisix
  http:
    - name: openapi-to-mcp-route
      match:
        paths:
          - /mcp
        methods:
          - GET
          - POST
      plugins:
        - name: key-auth
          enable: true
          config:
            _meta:
              filter:
                - - request_method
                  - "=="
                  - GET
            query: apikey
        - name: openapi-to-mcp
          enable: true
          config:
            transport: streamable_http
            base_url: "https://petstore3.swagger.io/api/v3"
            headers:
              Authorization: "special-key"
            openapi_url: "https://petstore3.swagger.io/api/v3/openapi.json"
Apply the updated configuration to your cluster:
kubectl apply -f openapi-to-mcp-ic.yaml❶ Only apply the key-auth on GET requests. This is because the apikey configured in the query parameter is only sent with the GET request to the SSE endpoint. It is not included in the subsequent POST message requests. As a result, the message requests will be blocked by the key-auth plugin if the filter is not applied.
❷ Configure the plugin to obtain the authentication key from the query.
After applying the Admin API, ADC, or APISIX CRD configuration, include the credential in the API7 Gateway address query parameter:
{
  "mcpServers": {
    "api7-petstore-mcp": {
      "url": "http://123.123.123.123:9080/mcp?apikey=john-key"
    }
  }
}
If the configuration is successful, you should see the available tools (external functions or services exposed to AI clients through MCP). You can then interact with Petstore directly from the chat window of your AI client.
If the authentication credential is not configured in the MCP server URL query, the AI client will be unable to load tools from the MCP server.
Pass Dynamic Headers to Upstream
Some upstream APIs require per-request credentials or context, such as user-specific API tokens, tenant identifiers, or session IDs. Pass values that differ between MCP clients to the upstream with the x-openapi2mcp-header-* convention.
The OpenAPI-to-MCP sidecar extracts any request header that matches x-openapi2mcp-header-{name}. It removes the prefix and forwards the value to the upstream API in the {name} header.
For example, a header x-openapi2mcp-header-my-token: abc123 in the client request becomes my-token: abc123 in the upstream API request.
How It Works
The gateway plugin and the OpenAPI-to-MCP sidecar work together to forward headers:
- Plugin-level headers: Headers configured in the plugin
headersfield are resolved at the gateway and forwarded asx-openapi2mcp-header-{name}to the sidecar. These headers are shared across all clients, but their values can vary per request when using built-in variables (opens in API7 Gateway docs). - Client-level headers (dynamic): Headers set by the MCP client in
mcp.jsonusing thex-openapi2mcp-header-*prefix are passed through the gateway to the sidecar, then forwarded to the upstream. These can vary per client.
When both static plugin headers and dynamic client headers are present, they are merged. If a client header has the same name as a plugin header, the plugin header takes precedence and the client value is ignored.
Transport-Specific Behavior
The behavior of dynamic headers depends on the transport method configured in the plugin:
streamable_http(recommended): Every MCP request is independent and stateless. The sidecar readsx-openapi2mcp-header-*headers on each request, so dynamic headers are truly per-request. This is the recommended transport for dynamic header passthrough.sse: Thex-openapi2mcp-header-*headers are only read during the initialGETrequest that establishes the SSE connection. Subsequent POST requests within the same session do not re-read these headers. As a result, dynamic headers are fixed for the entire session and cannot be changed mid-session.
If your use case requires different header values across requests (for example, per-user tokens that change), use streamable_http transport.
Configure Client Headers
If your MCP client supports custom headers (such as Cursor or Claude Desktop), add x-openapi2mcp-header-* entries to the headers field in mcp.json:
{
  "mcpServers": {
    "my-api-mcp": {
      "url": "http://123.123.123.123:9080/mcp",
      "headers": {
        "x-openapi2mcp-header-authorization": "Bearer <user-token>",
        "x-openapi2mcp-header-x-tenant-id": "tenant-42"
      }
    }
  }
}
When the MCP client sends a tools/call request, the sidecar extracts these headers and forwards them to the upstream API as:
authorization: Bearer <user-token>
x-tenant-id: tenant-42
Header Name Mapping
The sidecar extracts lowercase header names after the x-openapi2mcp-header- prefix for the upstream request. The following table summarizes the mapping:
| Client header | Upstream header |
|---|---|
x-openapi2mcp-header-authorization | authorization |
x-openapi2mcp-header-x-api-key | x-api-key |
x-openapi2mcp-header-my-token | my-token |
note
The x-openapi2mcp-header-* headers are consumed by the sidecar and are not forwarded to the upstream as-is. Only the extracted header names and values are sent to the upstream.
Security Considerations
Any x-openapi2mcp-header-* header sent by the MCP client is forwarded to the upstream API after prefix stripping. This means clients can inject arbitrary headers into upstream requests. To mitigate risks:
- Use gateway-level authentication plugins (such as
key-authorjwt-auth) to restrict access to the MCP route, ensuring only authorized clients can send requests. - If the upstream API relies on specific headers for authentication or authorization, ensure those headers are set in the plugin-level
headersconfiguration rather than relying on client-provided values, since plugin-level headers take precedence over client-level headers.
Flatten Tool Schema Parameters
The following example demonstrates how flatten_parameters affects the structure of query and path parameters in the generated MCP tool input schema.
Complete the previous example using Admin API, ADC, or APISIX CRD to set up MCP access to the Petstore APIs. Although the configuration does not explicitly set flatten_parameters, the parameter defaults to false.
In your AI client, such as Cursor, inspect the tool input schema. You should see parameters nested under pathParameters and queryParameters:
{
  "operations": {
    ...,
    "getPetById": {
      "method": "GET",
      "path": "/pet/{petId}",
      "pathParameters": {
        "type": "object",
        "required": ["petId"],
        "properties": {
          "petId": {
            "type": "integer",
            "description": "ID of pet to return"
          }
        },
        "additionalProperties": false
      }
    },
    "findPetsByStatus": {
      "method": "GET",
      "path": "/pet/findByStatus",
      "queryParameters": {
        "type": "object",
        "properties": {
          "status": {
            "type": "string",
            "enum": ["available", "pending", "sold"],
            "description": "Status values that need to be considered for filter",
            "default": "available"
          }
        },
        "additionalProperties": false
      }
    }
  }
}
Update the plugin to flatten query and path parameters:
curl "http://127.0.0.1:9180/apisix/admin/routes/openapi-to-mcp-route" -X PATCH \
  -H "X-API-KEY: ${ADMIN_API_KEY}" \
  -d '{
    "plugins": {
      "openapi-to-mcp": {
        "flatten_parameters": true
      }
    }
}'services:
- name: openapi-to-mcp-service
upstream:
type: roundrobin
scheme: https
pass_host: node
nodes:
- host: petstore3.swagger.io
port: 443
weight: 1
routes:
- name: openapi-to-mcp-route
uris:
- /mcp
methods:
- GET
- POST
plugins:
openapi-to-mcp:
flatten_parameters: true
transport: streamable_http
base_url: "https://petstore3.swagger.io/api/v3"
headers:
Authorization: "special-key"
openapi_url: "https://petstore3.swagger.io/api/v3/openapi.json"Synchronize the configuration to the gateway:
adc sync -f adc.yamlUpdate the PluginConfig:
# other configs
# ---
apiVersion: apisix.apache.org/v1alpha1
kind: PluginConfig
metadata:
  namespace: aic
  name: openapi-to-mcp-plugin-config
spec:
  plugins:
    - name: openapi-to-mcp
      config:
        flatten_parameters: true
        transport: streamable_http
        base_url: "https://petstore3.swagger.io/api/v3"
        headers:
          Authorization: "special-key"
        openapi_url: "https://petstore3.swagger.io/api/v3/openapi.json"
Apply the updated configuration to your cluster:
kubectl apply -f openapi-to-mcp-ic.yamlUpdate the ApisixRoute:
# other configs
# ---
apiVersion: apisix.apache.org/v2
kind: ApisixRoute
metadata:
  namespace: aic
  name: openapi-to-mcp-route
spec:
  ingressClassName: apisix
  http:
    - name: openapi-to-mcp-route
      match:
        paths:
          - /mcp
        methods:
          - GET
          - POST
      plugins:
        - name: openapi-to-mcp
          enable: true
          config:
            flatten_parameters: true
            transport: streamable_http
            base_url: "https://petstore3.swagger.io/api/v3"
            headers:
              Authorization: "special-key"
            openapi_url: "https://petstore3.swagger.io/api/v3/openapi.json"
Apply the updated configuration to your cluster:
kubectl apply -f openapi-to-mcp-ic.yamlIn your AI client, such as Cursor, inspect the tool input schema. You should see that parameters like status are no longer nested under pathParameters or queryParameters:
{
  "operations": {
    ...,
    "getPetById": {
      "parameters": {
        "type": "object",
        "required": ["petId"],
        "properties": {
          "petId": {
            "type": "integer",
            "description": "ID of pet to return"
          }
        },
        "additionalProperties": false
      }
    },
    "findPetsByStatus": {
      "parameters": {
        "type": "object",
        "properties": {
          "status": {
            "type": "string",
            "enum": ["available", "pending", "sold"],
            "description": "Status values that need to be considered for filter",
            "default": "available"
          }
        },
        "additionalProperties": false
      }
    }
  }
}
Customize MCP Tool Annotations
Availability
MCP tool annotations were introduced in API7 Enterprise 3.9.7 and APISIX 3.19.0.
The following example demonstrates how to add MCP tool annotations to OpenAPI operations exposed by the openapi-to-mcp plugin.
Without these annotations, AI clients only receive the generated tool name, description, and input schema. They cannot reliably tell whether a tool is read-only, destructive, or idempotent, which makes it harder to rank tools correctly and use them safely.
This is implemented in the bundled OpenAPI-to-MCP converter in two ways:
- It infers default tool behavior from the HTTP method.
- It reads explicit operation-level configuration from the OpenAPI vendor extension
x-mcp-annotations.
When both are present, explicit x-mcp-annotations values override the inferred defaults.
Complete the previous example using Admin API, ADC, or APISIX CRD to expose an OpenAPI document through the openapi-to-mcp plugin, then add annotations to the OpenAPI operations:
The previous Petstore example uses a public OpenAPI document that you cannot edit directly. To apply x-mcp-annotations, host your own OpenAPI document and update the openapi_url field in the openapi-to-mcp plugin configuration to point to that hosted document.
paths:
  /users/{id}:
    get:
      operationId: getUser
      summary: Get user information
      x-mcp-annotations:
        title: Get User
        readOnlyHint: true
        openWorldHint: false
    delete:
      operationId: deleteUser
      summary: Delete a user
      x-mcp-annotations:
        title: Delete User
        destructiveHint: true
Supported annotation fields:
titlereadOnlyHintdestructiveHintidempotentHintopenWorldHint
If x-mcp-annotations is not configured, the converter still applies default inference rules:
GET,HEAD, andOPTIONSmap toreadOnlyHint: trueDELETEmaps todestructiveHint: trueandidempotentHint: truePUTmaps toidempotentHint: true
After updating the hosted OpenAPI document, ask your MCP client to list tools. The following snippet shows the result.tools portion of the tools/list response:
{
  "tools": [
    {
      "name": "getUser",
      "annotations": {
        "title": "Get User",
        "readOnlyHint": true,
        "openWorldHint": false
      }
    },
    {
      "name": "deleteUser",
      "annotations": {
        "title": "Delete User",
        "destructiveHint": true,
        "idempotentHint": true
      }
    }
  ]
}
Notes:
- Only operation-level
x-mcp-annotationsis supported. - Invalid values and unsupported fields are ignored.
summaryanddescriptionstill control the generated tool description.titleis only read fromx-mcp-annotations.title.
Enable MCP Access to API7 Enterprise APIs
The following example demonstrates how to expose API7 Enterprise APIs through the MCP protocol, enabling AI models and clients to interact with your API7 Enterprise configuration.
Create a route with the openapi-to-mcp plugin:
curl "http://127.0.0.1:9180/apisix/admin/routes" -X PUT \
  -H "X-API-KEY: ${ADMIN_API_KEY}" \
  -d '{
    "id": "openapi-to-mcp-route",
    "uri": "/mcp",
    "methods": ["GET", "POST"],
    "plugins": {
      "openapi-to-mcp": {
        "transport": "streamable_http",
        "base_url": "https://your-dashboard.com",
        "headers": {
          "X-API-KEY": "<API7_ENTERPRISE_API_KEY>"
        },
        "openapi_url": "https://run.api7.ai/api7-ee/openapi-latest.json"
      }
    }
}'services:
- name: openapi-to-mcp-service
upstream:
type: roundrobin
scheme: https
pass_host: node
nodes:
- host: your-dashboard.com
port: 443
weight: 1
routes:
- name: openapi-to-mcp-route
uris:
- /mcp
methods:
- GET
- POST
plugins:
openapi-to-mcp:
transport: streamable_http
base_url: "https://your-dashboard.com"
headers:
X-API-KEY: "<API7_ENTERPRISE_API_KEY>"
openapi_url: "https://run.api7.ai/api7-ee/openapi-latest.json"Synchronize the configuration to the gateway:
adc sync -f adc.yamlapiVersion: apisix.apache.org/v1alpha1
kind: PluginConfig
metadata:
namespace: aic
name: openapi-to-mcp-plugin-config
spec:
plugins:
- name: openapi-to-mcp
config:
transport: streamable_http
base_url: "https://your-dashboard.com"
headers:
X-API-KEY: "<API7_ENTERPRISE_API_KEY>"
openapi_url: "https://run.api7.ai/api7-ee/openapi-latest.json"
---
apiVersion: gateway.networking.k8s.io/v1
kind: HTTPRoute
metadata:
namespace: aic
name: openapi-to-mcp-route
spec:
parentRefs:
- name: apisix
rules:
- matches:
- path:
type: Exact
value: /mcp
method: GET
- path:
type: Exact
value: /mcp
method: POST
filters:
- type: ExtensionRef
extensionRef:
group: apisix.apache.org
kind: PluginConfig
name: openapi-to-mcp-plugin-config
backendRefs:
- name: api7-enterprise-external-domain
port: 443
---
apiVersion: v1
kind: Service
metadata:
namespace: aic
name: api7-enterprise-external-domain
spec:
type: ExternalName
externalName: your-dashboard.com
---
apiVersion: apisix.apache.org/v1alpha1
kind: BackendTrafficPolicy
metadata:
namespace: aic
name: api7-enterprise-external-domain
spec:
targetRefs:
- group: ""
kind: Service
name: api7-enterprise-external-domain
passHost: node
scheme: httpsApply the configuration to your cluster:
kubectl apply -f openapi-to-mcp-ic.yamlapiVersion: apisix.apache.org/v2
kind: ApisixRoute
metadata:
namespace: aic
name: openapi-to-mcp-route
spec:
ingressClassName: apisix
http:
- name: openapi-to-mcp-route
match:
paths:
- /mcp
methods:
- GET
- POST
plugins:
- name: openapi-to-mcp
enable: true
config:
transport: streamable_http
base_url: "https://your-dashboard.com"
headers:
X-API-KEY: "<API7_ENTERPRISE_API_KEY>"
openapi_url: "https://run.api7.ai/api7-ee/openapi-latest.json"
upstreams:
- name: api7-enterprise-external-domain
---
apiVersion: apisix.apache.org/v2
kind: ApisixUpstream
metadata:
namespace: aic
name: api7-enterprise-external-domain
spec:
ingressClassName: apisix
externalNodes:
- type: Domain
name: your-dashboard.com
port: 443
passHost: node
scheme: httpsApply the configuration to your cluster:
kubectl apply -f openapi-to-mcp-ic.yaml❶ Configure the route to allow GET and POST methods. The GET method enables the tool discovery and response streaming (SSE), while the POST method enables the execution and action capabilities (messages).
❷ Configure the transport method to be streamable_http (recommended for production).
❸ Replace with your API7 Enterprise address, where requests will be forwarded.
❹ Replace with your credential in the X-API-KEY header for API7 Enterprise authentication.
❺ Configure the URL of the API7 Enterprise OpenAPI document.
In your AI client, such as Cursor, update the MCP settings with your API7 Gateway address and append the previously created route path. For instance:
{
  "mcpServers": {
    "api7-enterprise-mcp": {
      "url": "http://123.123.123.123:9080/mcp"
    }
  }
}
If the configuration is successful, you should see the available tools (external functions or services exposed to AI clients through MCP).
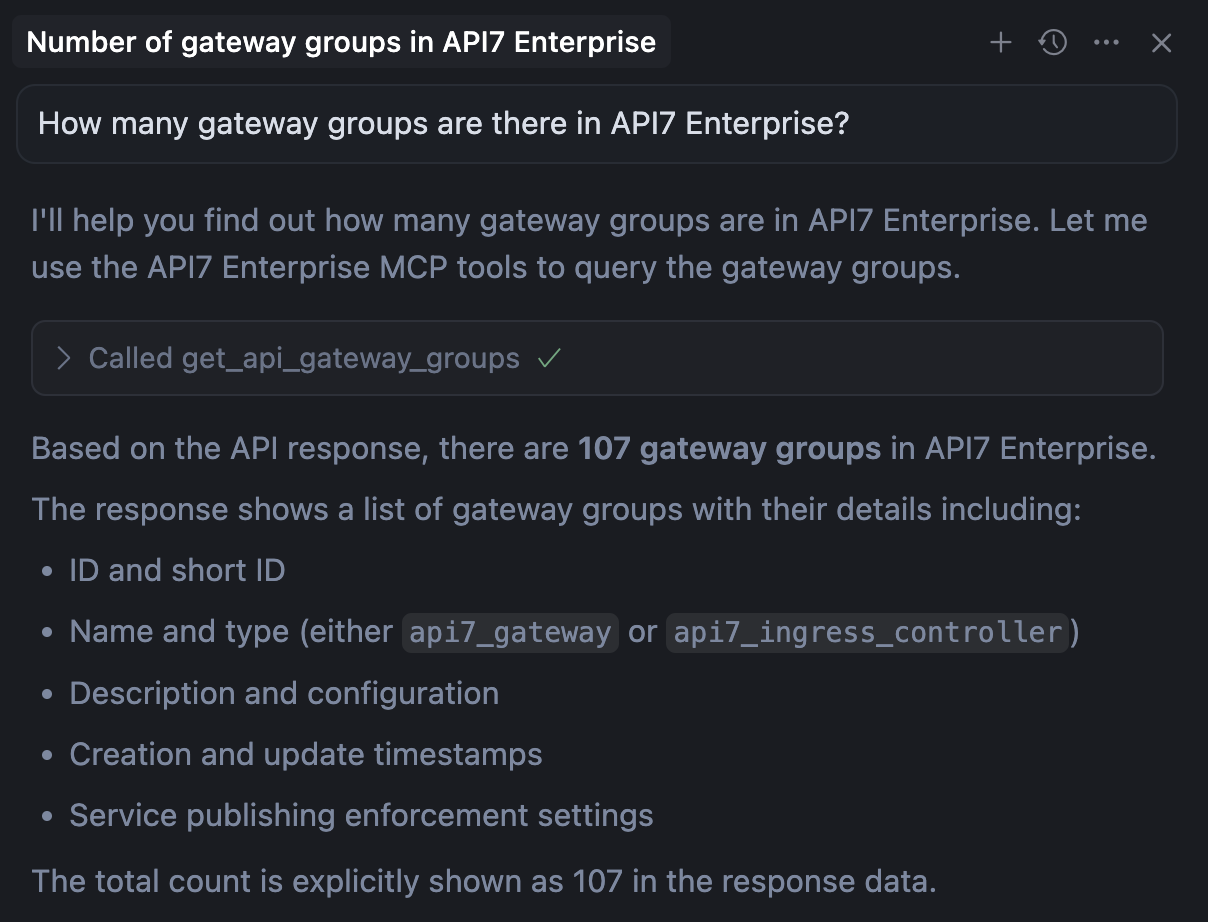
You can now interact with API7 Enterprise directly from the chat window of your AI client. For example, try asking: "How many gateway groups are there in API7 Enterprise?"
API7 Gateway Deployment and Compatibility
API7 Gateway forwards MCP requests to a separate OpenAPI-to-MCP service. The Enterprise Petstore example demonstrates the complete flow.
Deploy the OpenAPI-to-MCP Service
Starting with API7 Enterprise 3.9.10, the OpenAPI-to-MCP service is no longer bundled in the gateway image. Deploy it alongside the gateway in the same network namespace.
- Kubernetes (Helm): set
openapiToMcp.enabled: truein the gateway chart values to run the service as a sidecar. - Docker or bare metal: run
api7/openapi-to-mcp:1.0.2or later and share the gateway's network namespace, for example with--network=container:<gateway>or host networking. A shared Docker bridge network is not sufficient because the plugin connects to127.0.0.1:3000by default.
If the service is unreachable, the plugin will fail with a 503. This applies equally to the mcp-tools-acl plugin. To run the service on a different port, see Static Configurations.
The Helm chart pins a compatible service image. The cache_enabled and cache_ttl route options require service image 1.0.5 or later.
Configure OpenAPI Document Caching
The service caches each OpenAPI document and its generated tools by the openapi_url string. Entries expire after 3600 seconds by default. Document content and HTTP cache headers do not invalidate an entry, so change the URL, for example with a version query parameter, to load an update immediately.
API7 Enterprise 3.9.21 introduced per-route cache_enabled and cache_ttl settings, which default to true and 3600. They are not available in API7 Enterprise 3.10.7. With service image 1.0.5 or later, route settings take precedence over the container environment variables below. Disable caching on a route while its document changes frequently.
For Docker and bare-metal deployments, configure cache defaults on the OpenAPI-to-MCP container:
| Variable | Default | Description |
|---|---|---|
CACHE_ENABLED | true | Set to false to disable caching. Every request then downloads and parses the document again, which increases latency. |
CACHE_TTL | 3600 | Seconds an entry stays in the cache. |
The Helm chart does not expose these environment variables. Helm deployments use the defaults or the per-route plugin settings.
Add the Service to Docker Compose
When you add a gateway instance in the Dashboard, it generates a ready-to-use docker-compose.yaml. Keep the generated gateway service unchanged and add the OpenAPI-to-MCP service:
services:
  openapi-to-mcp:
    image: api7/openapi-to-mcp:1.0.6
    network_mode: "service:gateway"
    restart: always
The network_mode setting makes the service share the gateway service's network stack so the plugin can reach it at 127.0.0.1:3000. If the generated gateway service has another name, replace gateway with that name. A shared Docker bridge network is not sufficient.
Start the services:
docker compose up -dTroubleshooting
For native APISIX, inspect the gateway error log. A specification-fetch or parsing failure prevents the plugin from building the tools list. Verify that the URL returns an OpenAPI document containing API paths, rather than an HTML error page or a document containing only components.
The following log location and known issues apply to the Enterprise OpenAPI-to-MCP service.
To diagnose issues, check the openapi-to-mcp error log at /usr/local/openapi2mcp/error.log in your gateway container or pod. Note that this log is separate from the gateway’s error log.
Known Issues
-
The error
Cannot use 'in' operator to search for '$ref' in undefinedtypically occurs when an OpenAPI v2 document is used inopenapi_url. The plugin only supports OpenAPI v3 document inopenapi_url. -
The plugin has a known parsing issue when handling
oneOfschemas in OpenAPI v3 document retrieved fromopenapi_url. In this case, the MCP client will be stuck at tool loading.